Building Bird boxes
You can buy bird boxes ready made, but they are usually only made for small song birds. If they are built for a particular bird, they are usually quite expensive. If you have some cutting tools and a drill, you can build most bird boxes from one plank of wood.
Enclosed bird boxes should have the following characteristics even if the sizes are different: holes for ventilation and drainage; untreated wood; a sloped and overhanging lid; and a recessed floor and possibly an interior with ridges to allow birds to climb out.

You can adjust the above diagram for a screech owl box for any dimension that you need.
The front is a little bit less than the required height, while the sides average the required height. The width of the plank should be the same dimension as the floor width in most cases. Remember that widths on lumber are actually 3/4 inch less than quoted and thicknesses are a 1/4 inch less than quoted. An 8 in wide plank only measures 7 1/4 inches so you need a 1 x 10 inch plank that is at least 8 feet long for your screech owl box.
| |
 |
|
| |
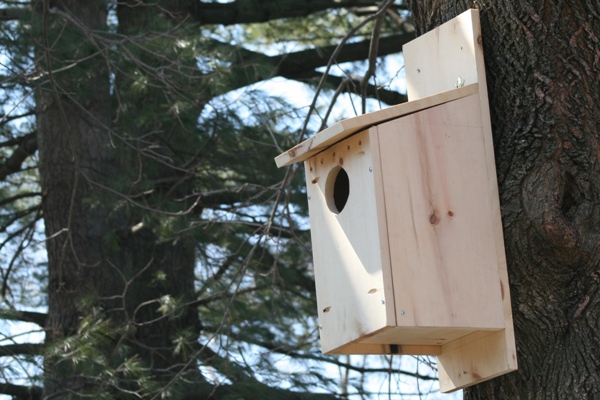
This is a bird box for screech owls. It has been placed at the correct height in the best direction in an area with several other trees. Owls will visit the box to hang out for the day and then disappear for a while or they may even choose to use this box as a roosting site. |
|
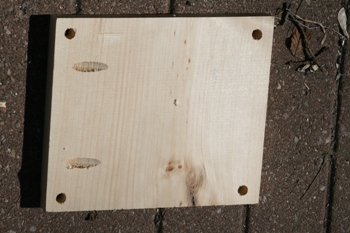 |
Except for the front, all the wood is going to be attached to the long piece of wood at the rear. Where possible, I have used pocket holes for attachment; however, if you do not have the equipment to do this, then simply drill pilot holes and screw through the back piece. First of all, the floor should be screwed on so that the side pieces can be fit around it. You can see in the picture that I made two pocket holes for attachment and drilled four 1/4 inch holes for drainage. |
 |
Please note that the short side of the floor is the front/back of the box.
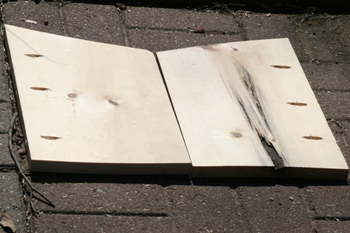
The side pieces are positioned a half inch lower than floor so that the floor is recessed. I used 3 pocket holes on the larger side of each piece. Again, you can always just drill and screw through the back. See the completed box above. |
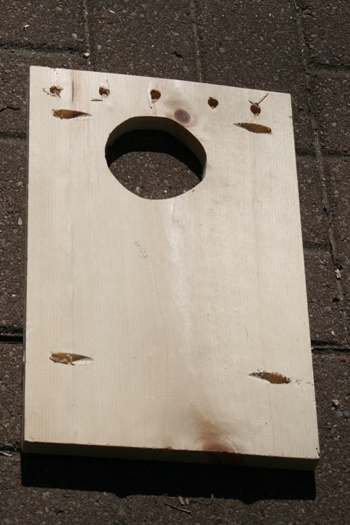 |
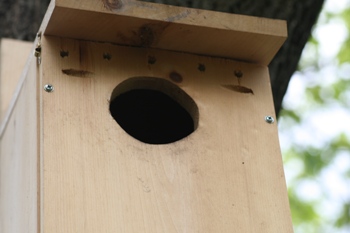
Before attaching the front piece, you need to make an entrance hole, some small ventilation holes and a ladder.
For entrance holes 2 inches or less, a hole saw on the end of a drill is useful. For entrance holes larger than 2 inches you can drill a small hole and then use a jig saw to make the hole larger. Use a pencil to draw the correct position of the hole, which must be placed at the correct height (see the dimensions data provided).
The front piece should have some holes drilled in the top part of the front piece for ventilation. In the picture, there are five 1/4 inch holes drilled across the top.
The bottom of the front piece should align with the side pieces to create a complete recessed floor. |
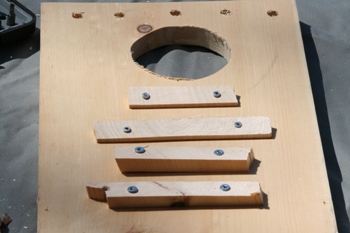 |
The inside of the front piece should have some rough shallow pieces of wood screwed in to allow the owlets to climb up to the entrance. The wood should be roughened so that they can get a proper grip. Alternatively, you can place a piece of metal mesh with a 1/4 inch mesh size. You can also screw in a perch for the adults to stand on while feeding. Most bird boxes do not need these particular features. |
 |
I did not use the pocket holes shown in this picture. The front piece was attached to the side pieces using pilot holes and screws as shown in the picture. The top of the box has to be long enough to overlap the box by a couple of inches. |
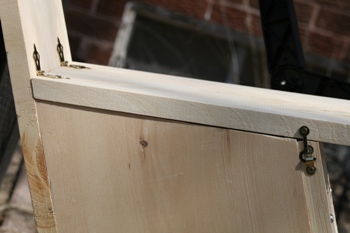 |
The back part of the top must also be cut at an angle so that it is flush with the rear piece. It is attached to the back piece using some decorative brass hinges and there is a small brass latch to prevent the box from being easily opened.
Insert two holes into the top of the rear piece and one at the bottom to enable you to nail it to a tree. |
| |
|
| |
|
When building boxes for outside, remember that wood glue does not work in cold temperatures so you must screw in everything. I would also advise using a square to draw lines across the rear piece to ensure that the sides and the floor are aligned properly.
